


The DevOps process and tooling have continued to evolve, as building on the cloud becomes a growing need for products that require scale and without worrying about physical infrastructure. You only pay for the resources you use such as only paying when your code runs. Simply put; the benefits of the cloud while several include:
- Stop guessing about capacity.
- Avoid huge capital investments upfront.
- Pay for only what you use.
- Scale globally in minutes.
- Deliver faster and e.t.c.
Why template your infrastructure?
With the advent of cloud computing, came several tools that enabled us to deploy the underlying infrastructure components that provide security and services to your servers by writing scripts.
Infrastructure as code (IaC) is to make operations faster by eliminating manual processes of navigating through the AWS console to provision resources and thus eliminating the slack in the process.
A code-based approach makes it easier to get more done in less time, you could introduce the version control tools, you could push templates into repositories for collaborations, semantic versioning of templates, introduce checks and reviews on the templates to reduce errors. Interesting right 😊!
Let's get started
In this tutorial, you’ll learn how to deploy infrastructure using CloudFormation script, AWS proprietary tool for Infrastructure as Code. it's used for managing, configuring, and deploying infrastructure.
Prerequisites
- Version Control: A popular recommendation is Git
- Code Editor for YAML and JSON: Vscode is a great lightweight code editor, with a plethora of plugins to customize your coding experience.
- Amazon Web Services account: visit aws.amazon.com and sign in.
Create Access key ID
- In the AWS console, Choose the region closest to your location.
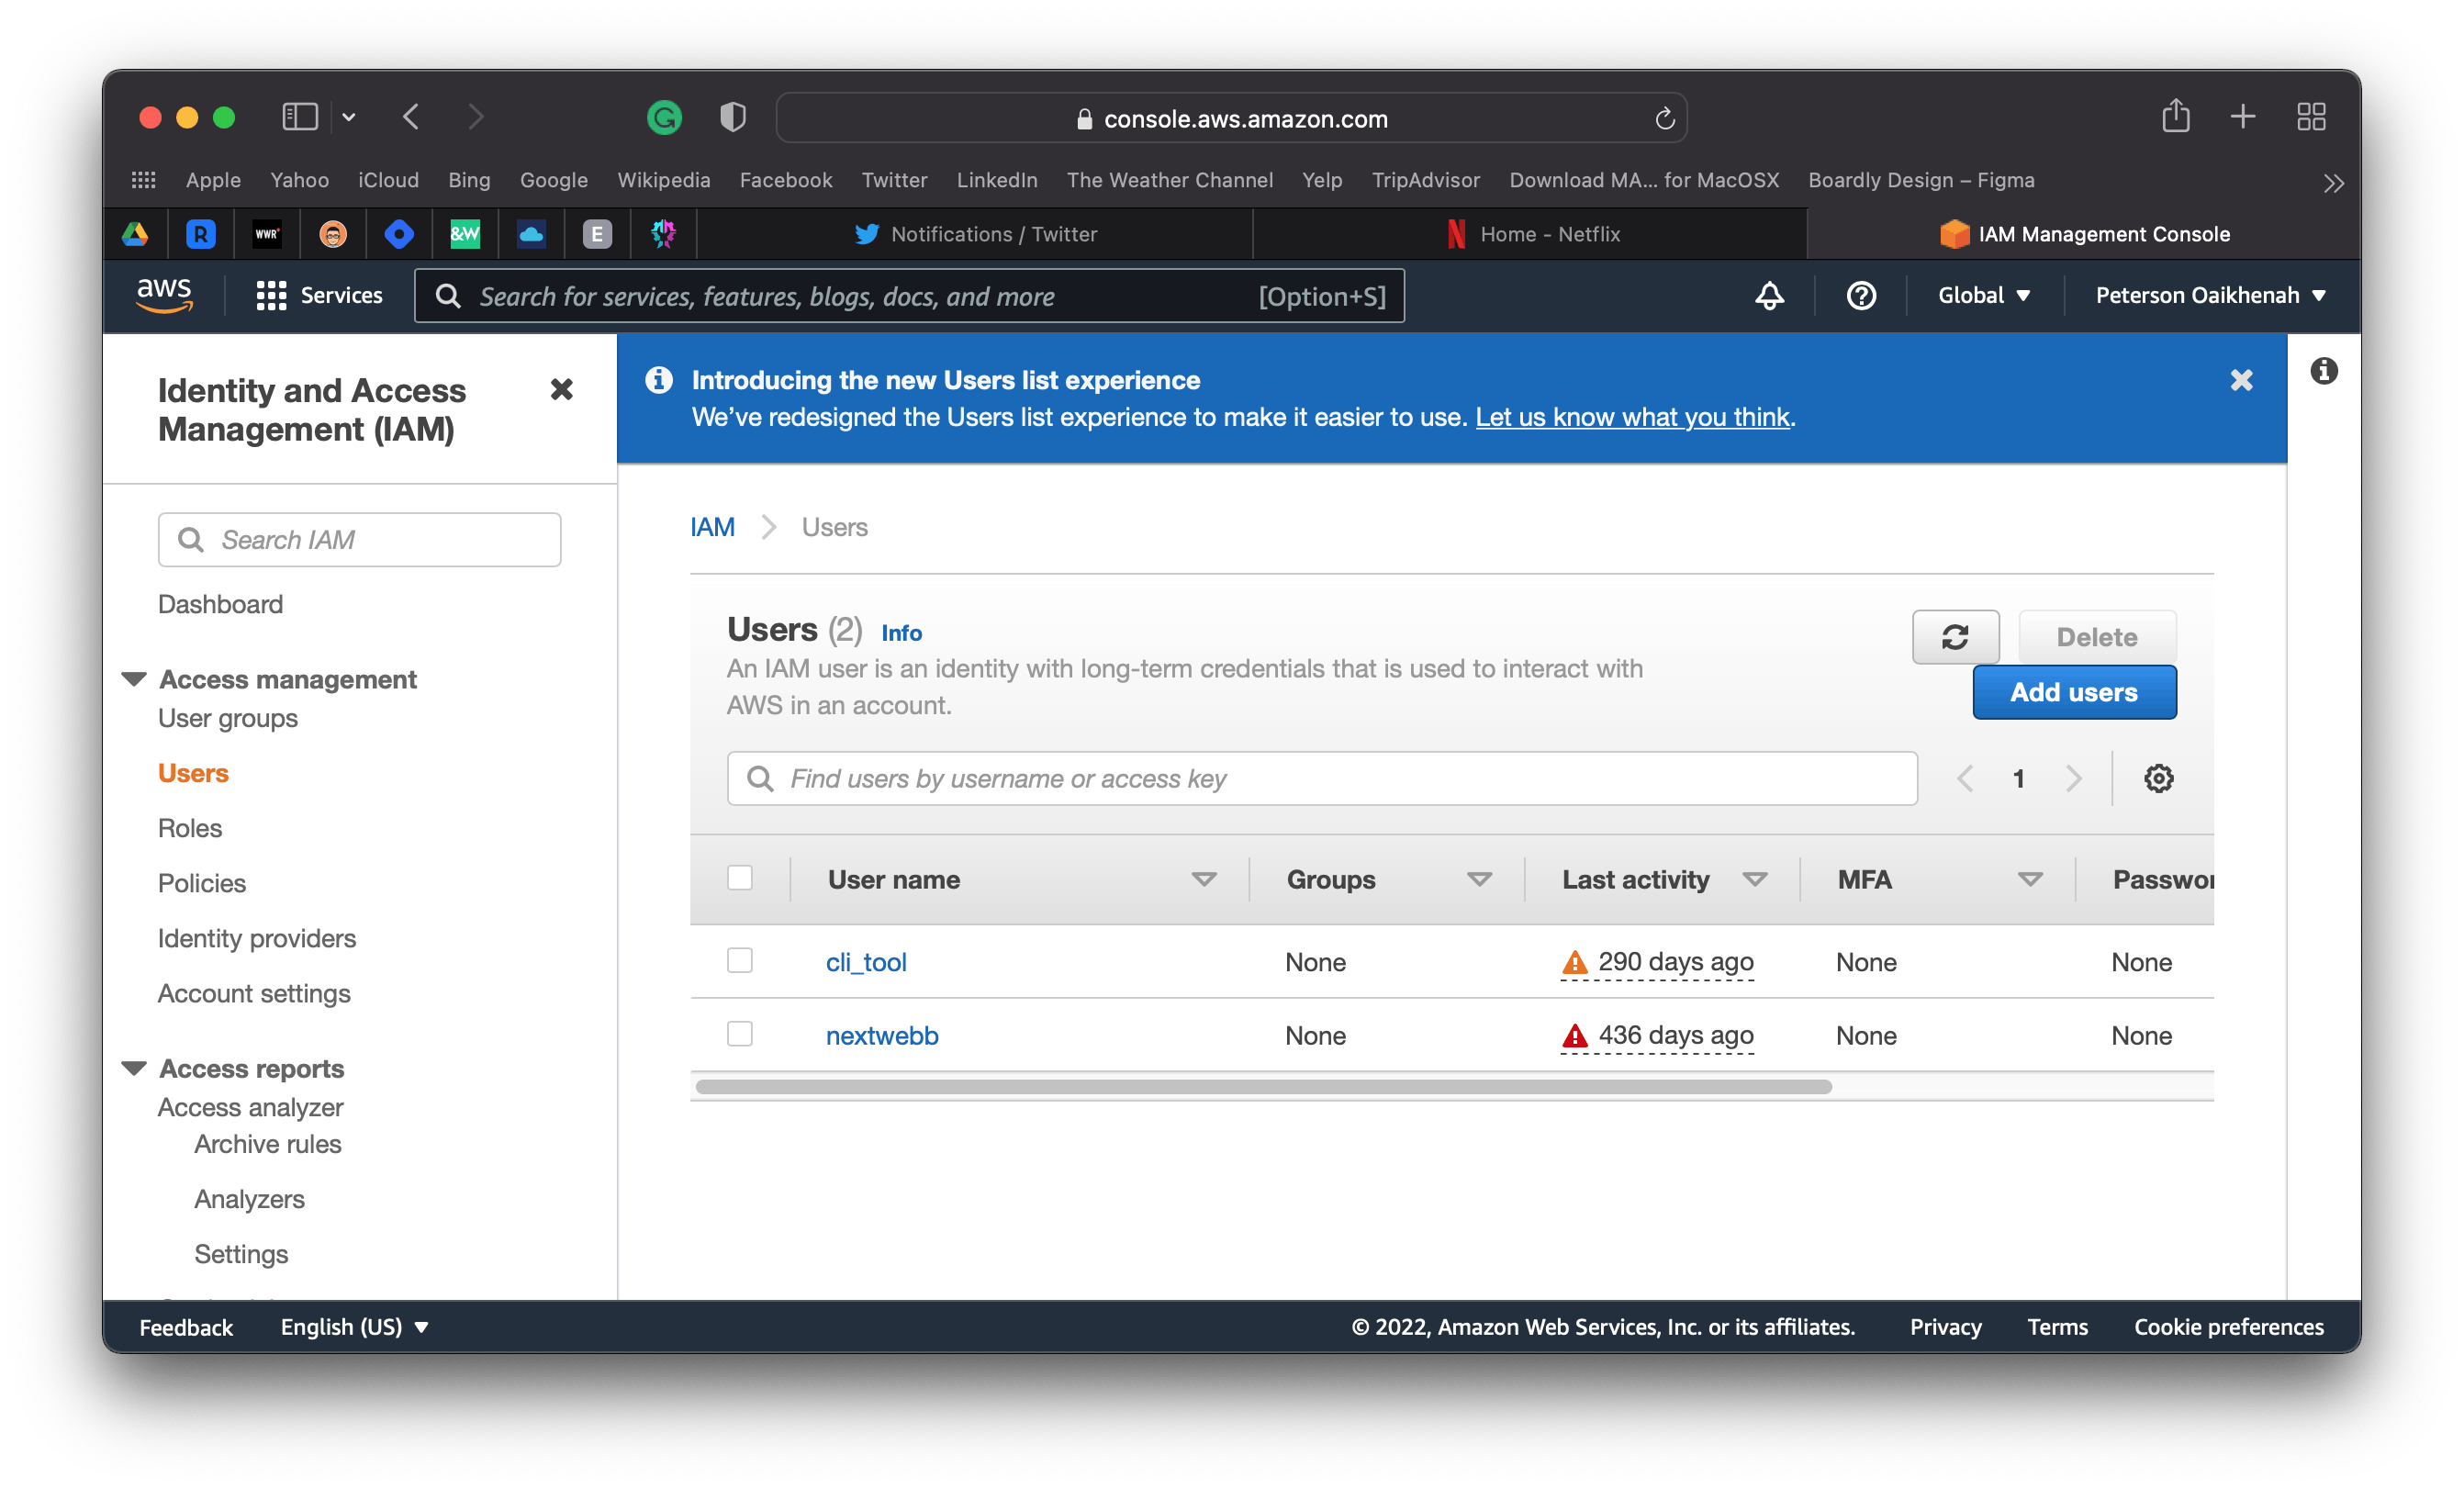
- Navigate to the IAM service, click on users, create a user with "programmatic access." This allows us to use code to interact with AWS, instead of relying on mouse clicking in the AWS console.
- For IAM access, choose “administrator access.” This is just for the initial setup of your account. Afterward, you’ll want to limit access to only what you need.
Remember not to save these in your code or to check into any repositories.
After saving and creating the user, you should have this page below in the user's section:
Next, configure the AWS CLI
let's follow these steps;
- Download and install the AWS CLI tool.
- In the terminal, type
aws --version: this displays the package version, thus verifying that you have the AWS CLI tool installed. - To set up your AWS CLI, type
aws configurein the terminal. Next, when prompted for the AWS credentials paste in your "Access Key ID" and "Secret access key" accordingly. - Next, use a region closest to your location.
One way to check if your "AWS CLI" is set up properly is to try a command. You can try listing your S3 buckets with aws s3 ls. This will be blank if you have no S3 buckets. However, if you have no error message, then you’ve verified that your user has API access to communicate with AWS.
Next, write your cloudformation script
CloudFormation uses a declarative language like SQL and not an imperative language. It lets you specify what you want, without requiring you to specify how to get it.
CloudFormation abstracts the complexities of resource dependencies. So that you don’t have to specify which resource to start up before another. There are cases where you can specify that a resource depends on another resource, but ideally, you’ll let CloudFormation take care of dependencies.
Cloud formation scripts can be written in YAML and JSON file formats. but YAML is the industry preferred version that’s used for AWS.
In this example, you'll provision a VPC on AWS below. Each VPC is a fundamental layer of your infrastructure. It isolates your network environment on a public cloud.
#testcfn.yml
Description: >
    Nextwebb / localhost
    This template deploys a VPC.
Resources:
    TestVPC:
        Type: AWS::EC2::VPC
        Properties:
            CidrBlock: 10.0.0.0/16
            EnableDnsHostnames: true
The example above provisions a resource, three parts constitute the script:
Name: A unique name you want to give to the resource. In this case, we called it "TestVPC".
Type: Specifies the actual hardware resource that you’re deploying. we called it "AWS VPC".
Properties: Specifies the configuration options for your resource. You can think of these as all the drop-down menus and checkbox options that you would see in the AWS console if you were to request the resource manually. It's a good practice to consult the cloudformation docs for resource properties and know which are optional or defaults.
Just like we used above, the "CidrBlock" property specifies a range of(65,536) IP addresses, and the "EnableDnsHostnames" property Indicates whether the instances launched in the VPC get DNS hostnames.
How to run CloudFormation
- In this tutorial, we’ll assume your CloudFormation file name is called testcfn.yml, and you’re giving your stack the name "ourfirsttest".
In the terminal, to use your yml code to request the resources, type the following in the same directory as your yml file:
aws cloudformation create-stack
--stack-name ourfirsttest
--region us-west-2
--template-body testcfn.yml
You may also want to use
update-stackwhen you want to update an existing stack instead of destroying your stack and creating a new one.
Once the above command is run, we should an output response like this. Depending on the response format you chose it would be text or object containing a stackId.
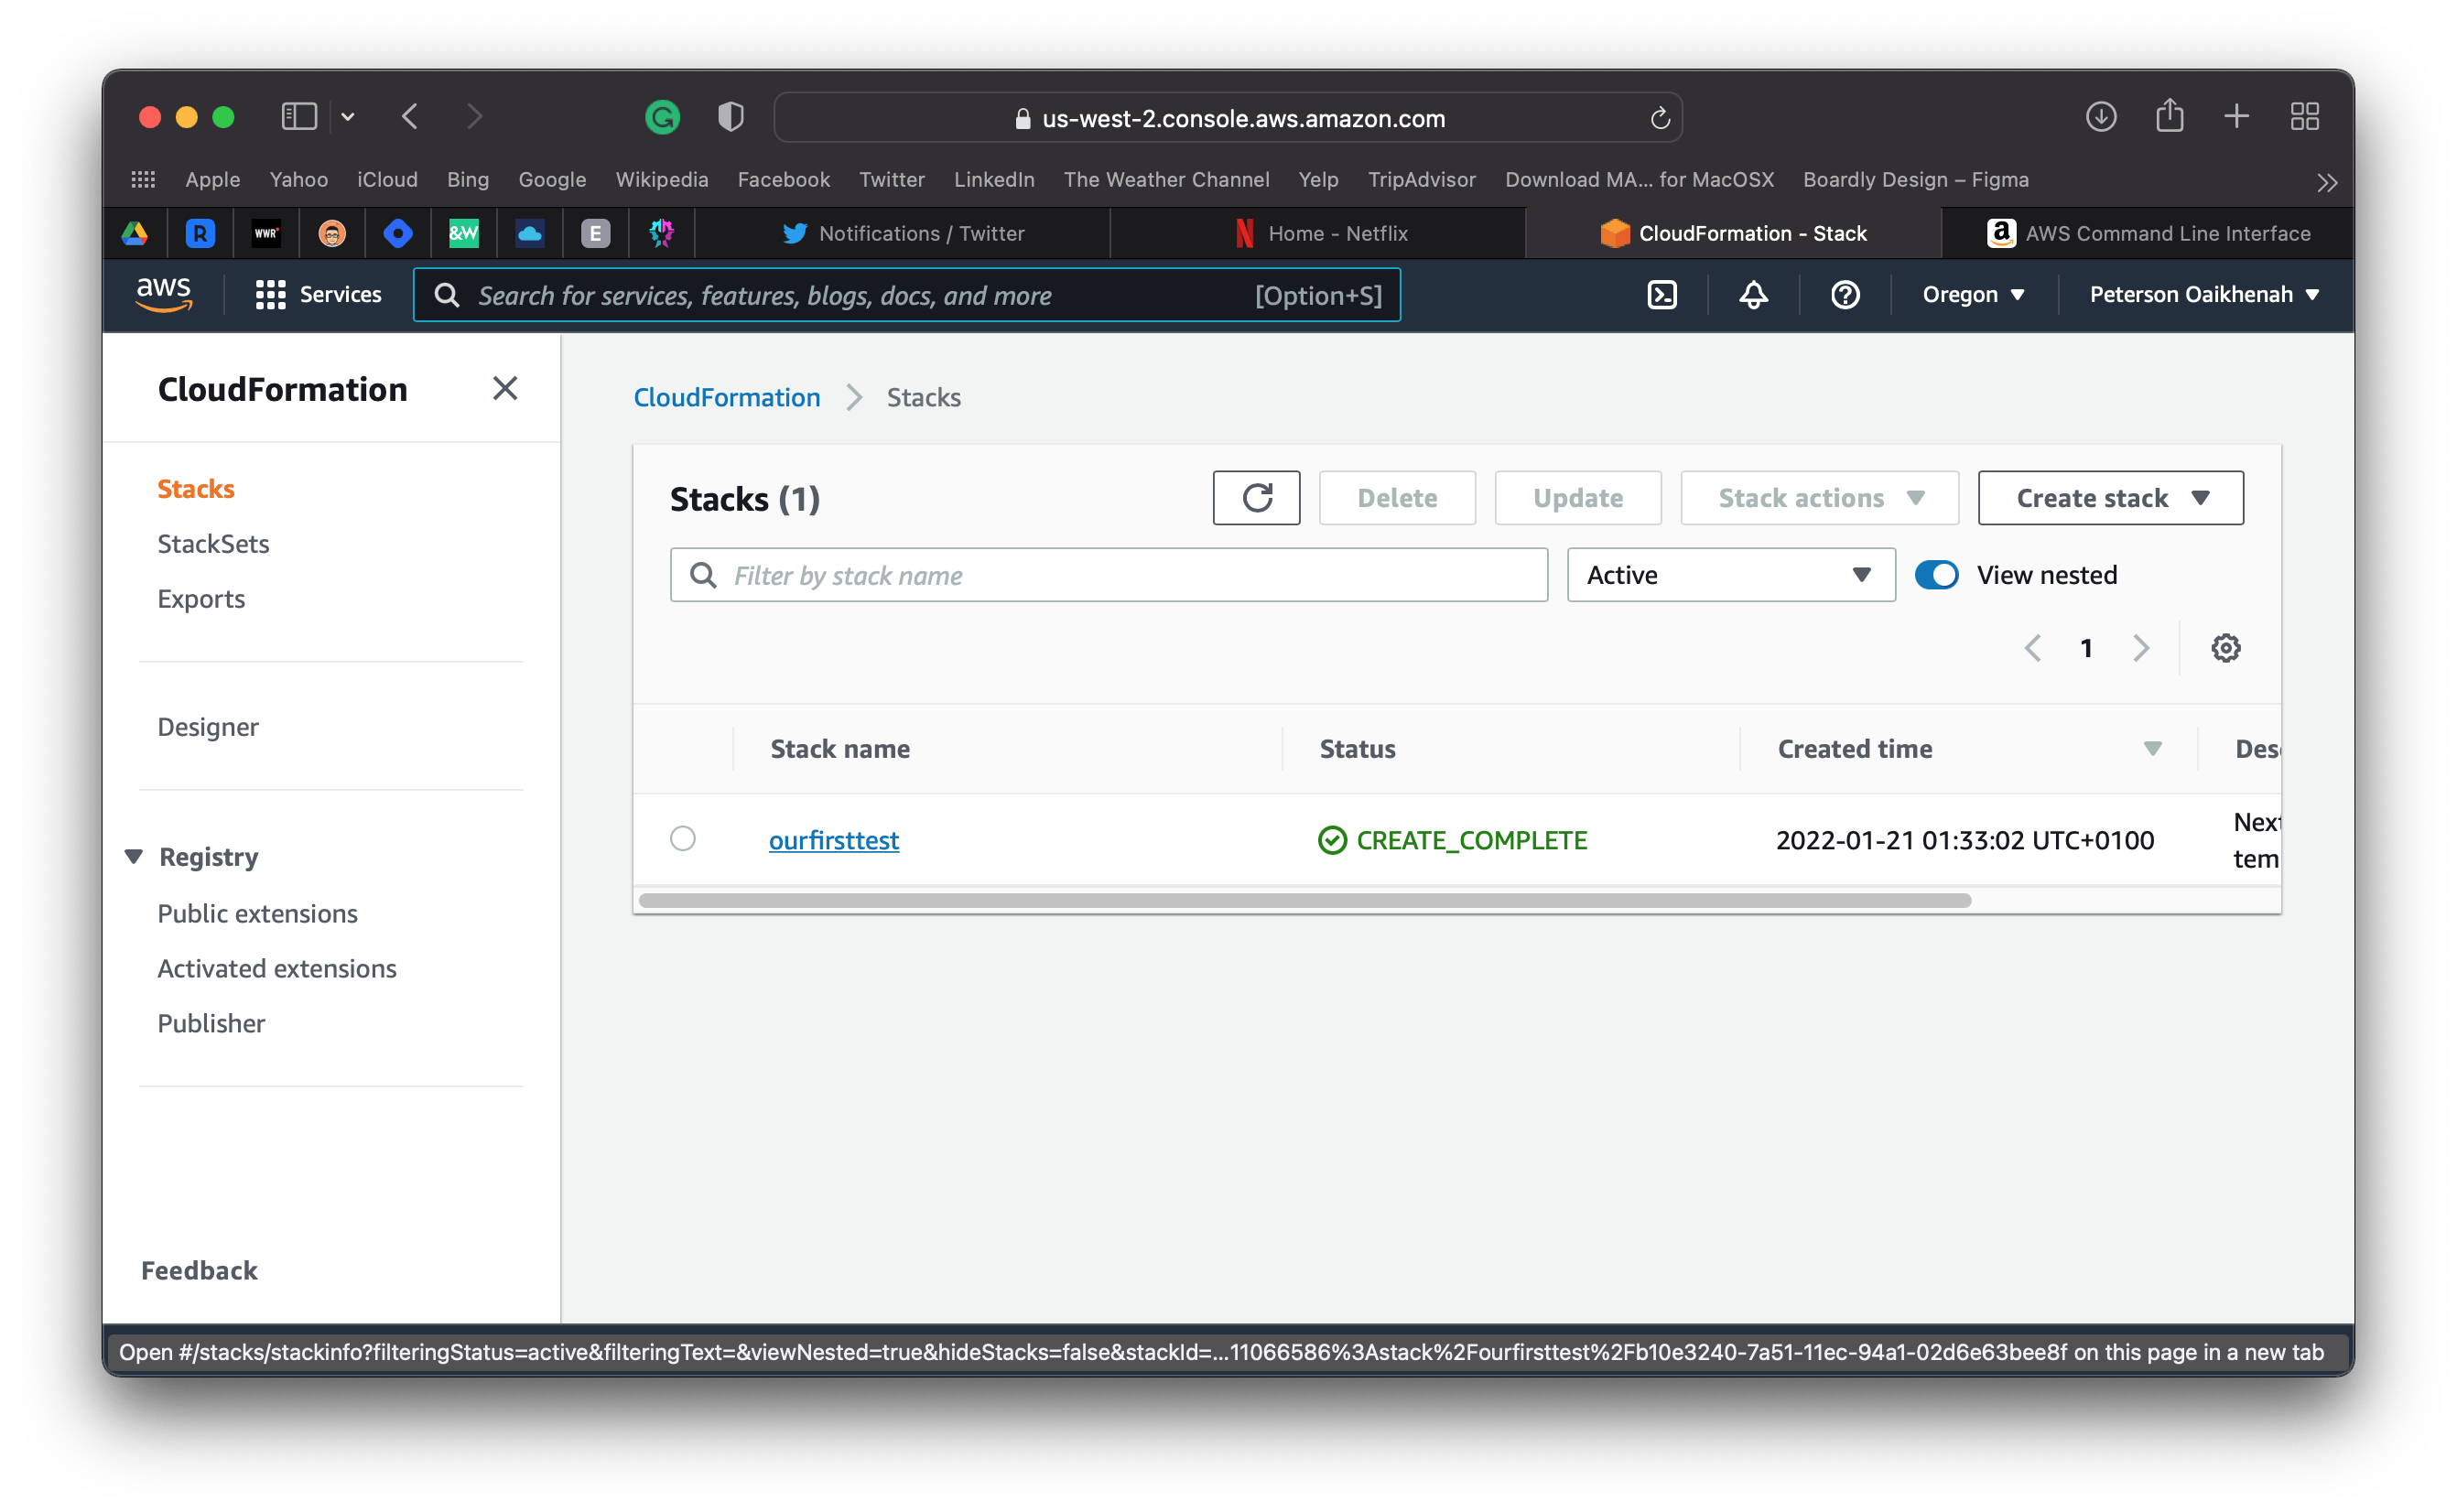
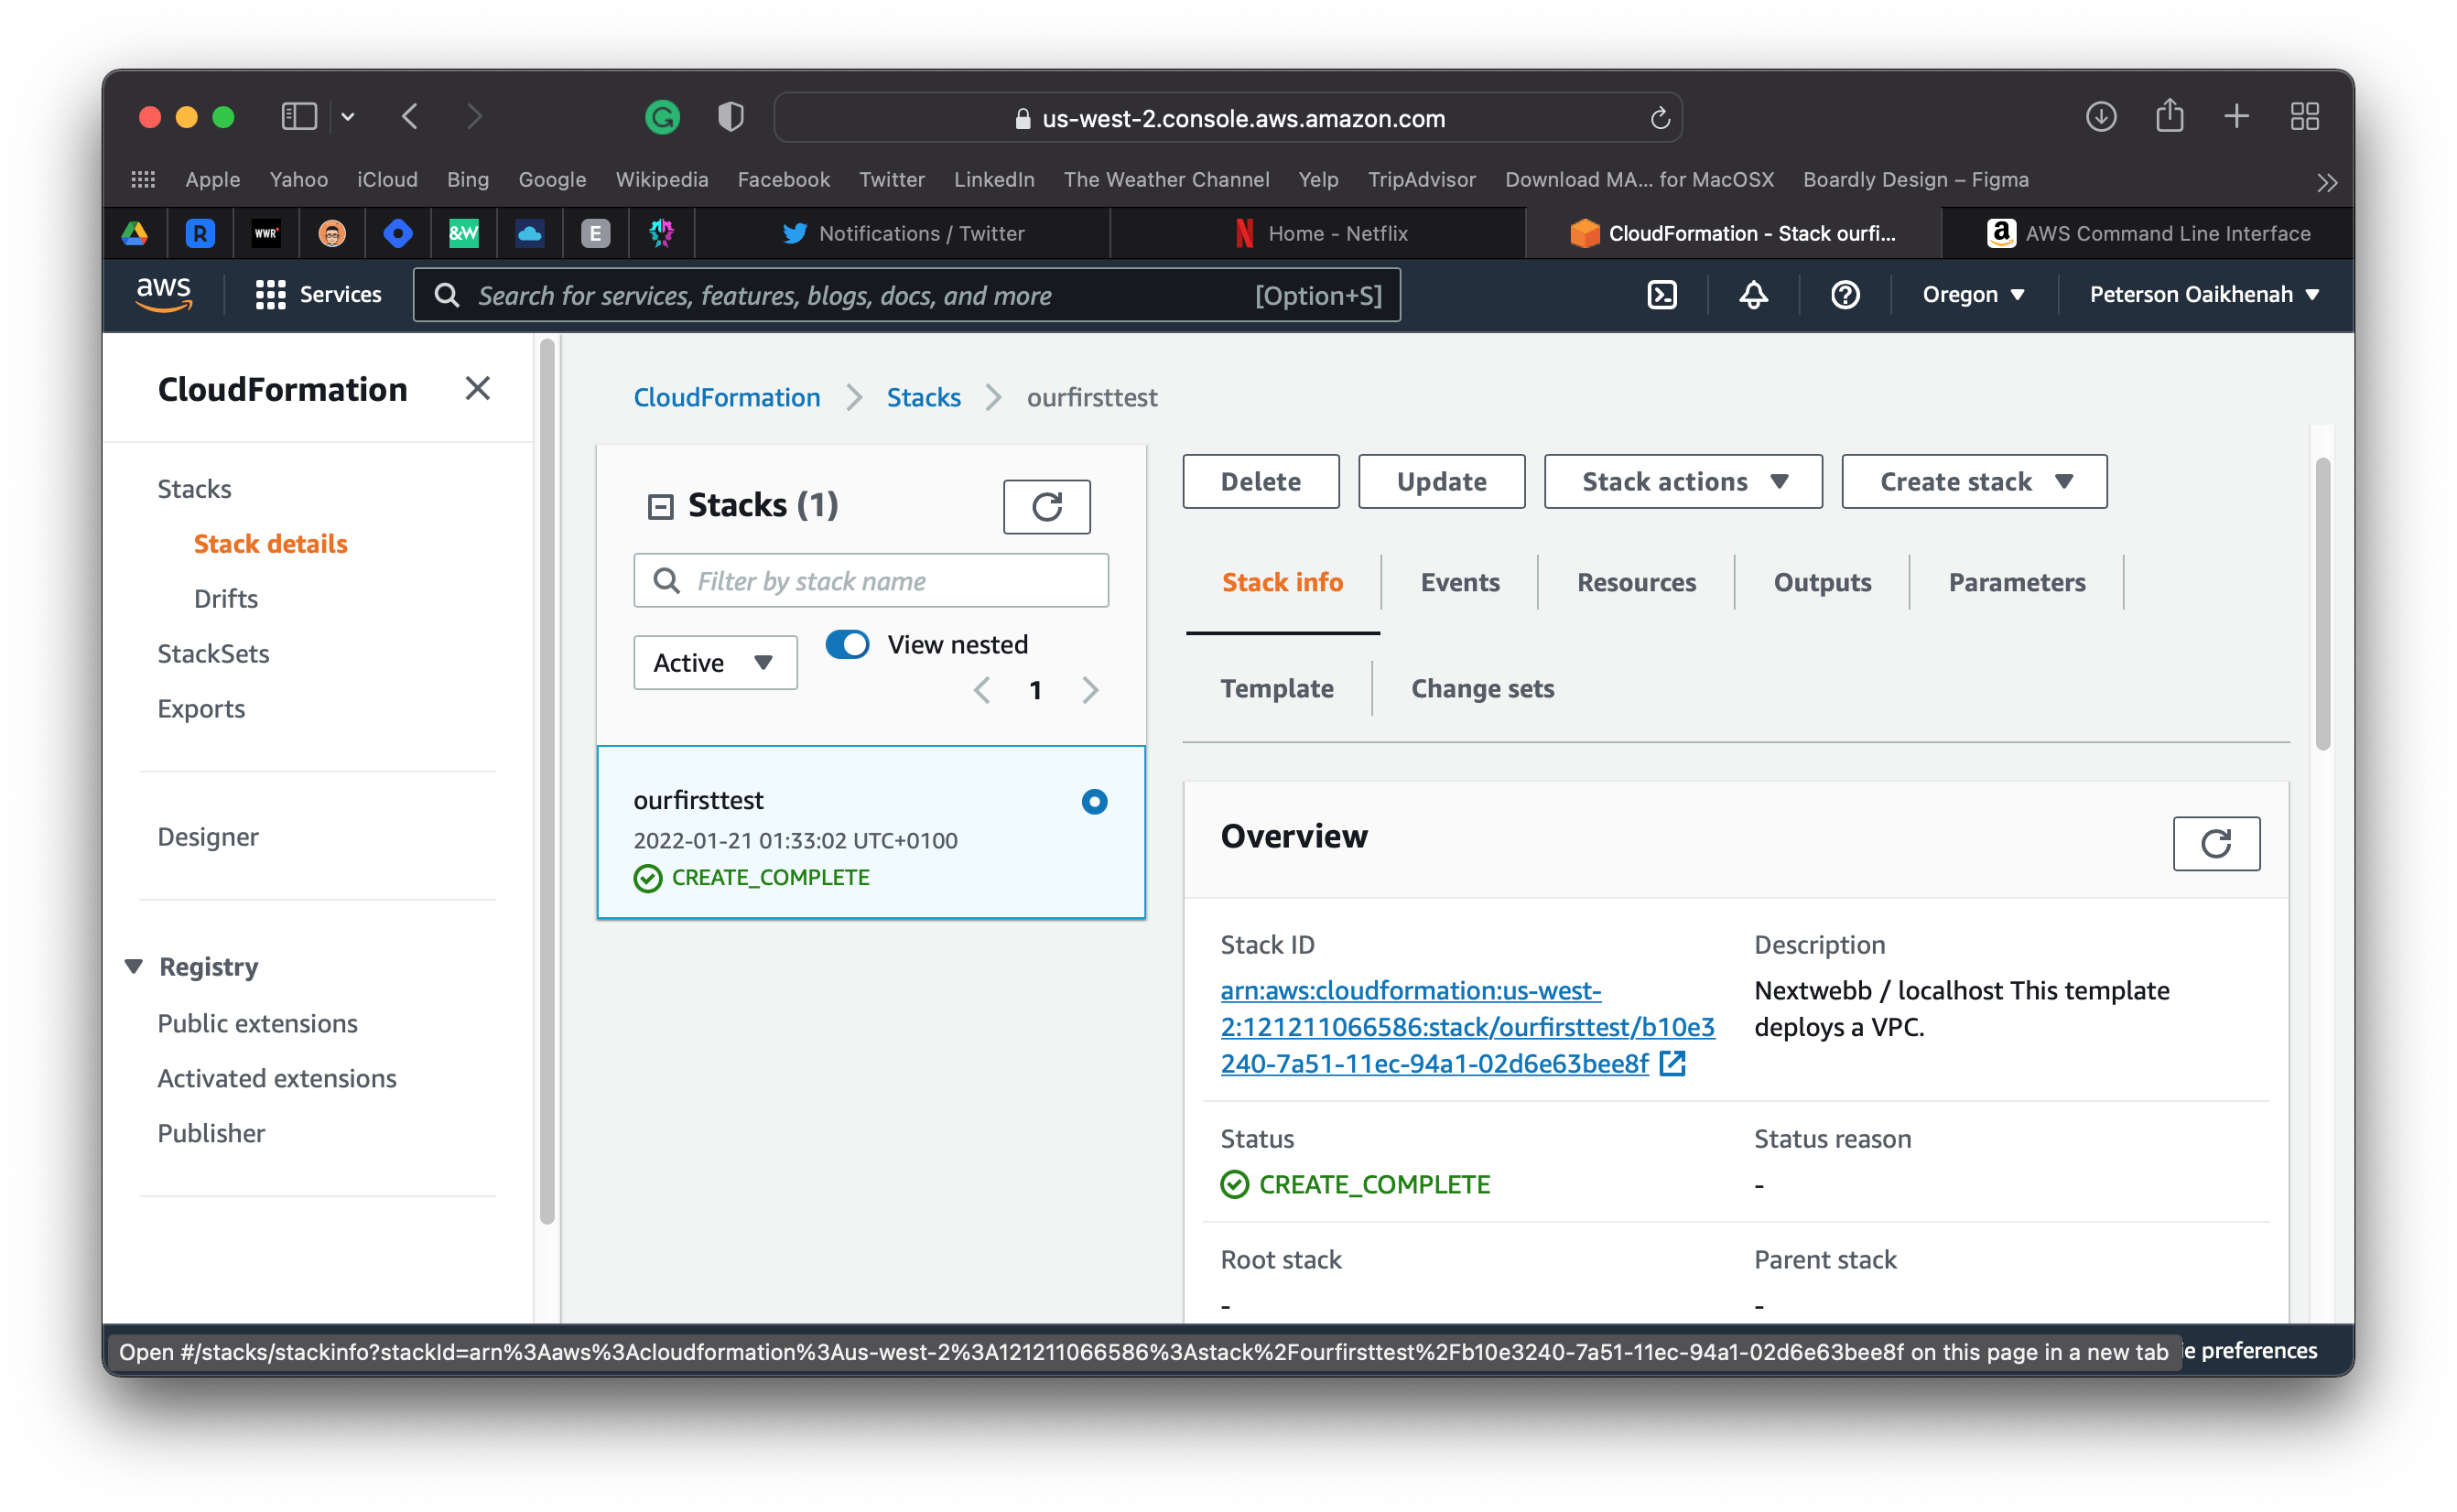
A stack is a group of resources. These are the resources that you want to deploy, and that are specified in the YAML file.

Navigate to the AWS console and select the cloudformation service. You should see the name of the stack you chose and the status of the resources provisioned.
Navigate to the AWS console, you should have two VPC's. One is the default VPC that comes with your aws account and the other should be the one you created. You can differentiate them by the IP range and their Ids.
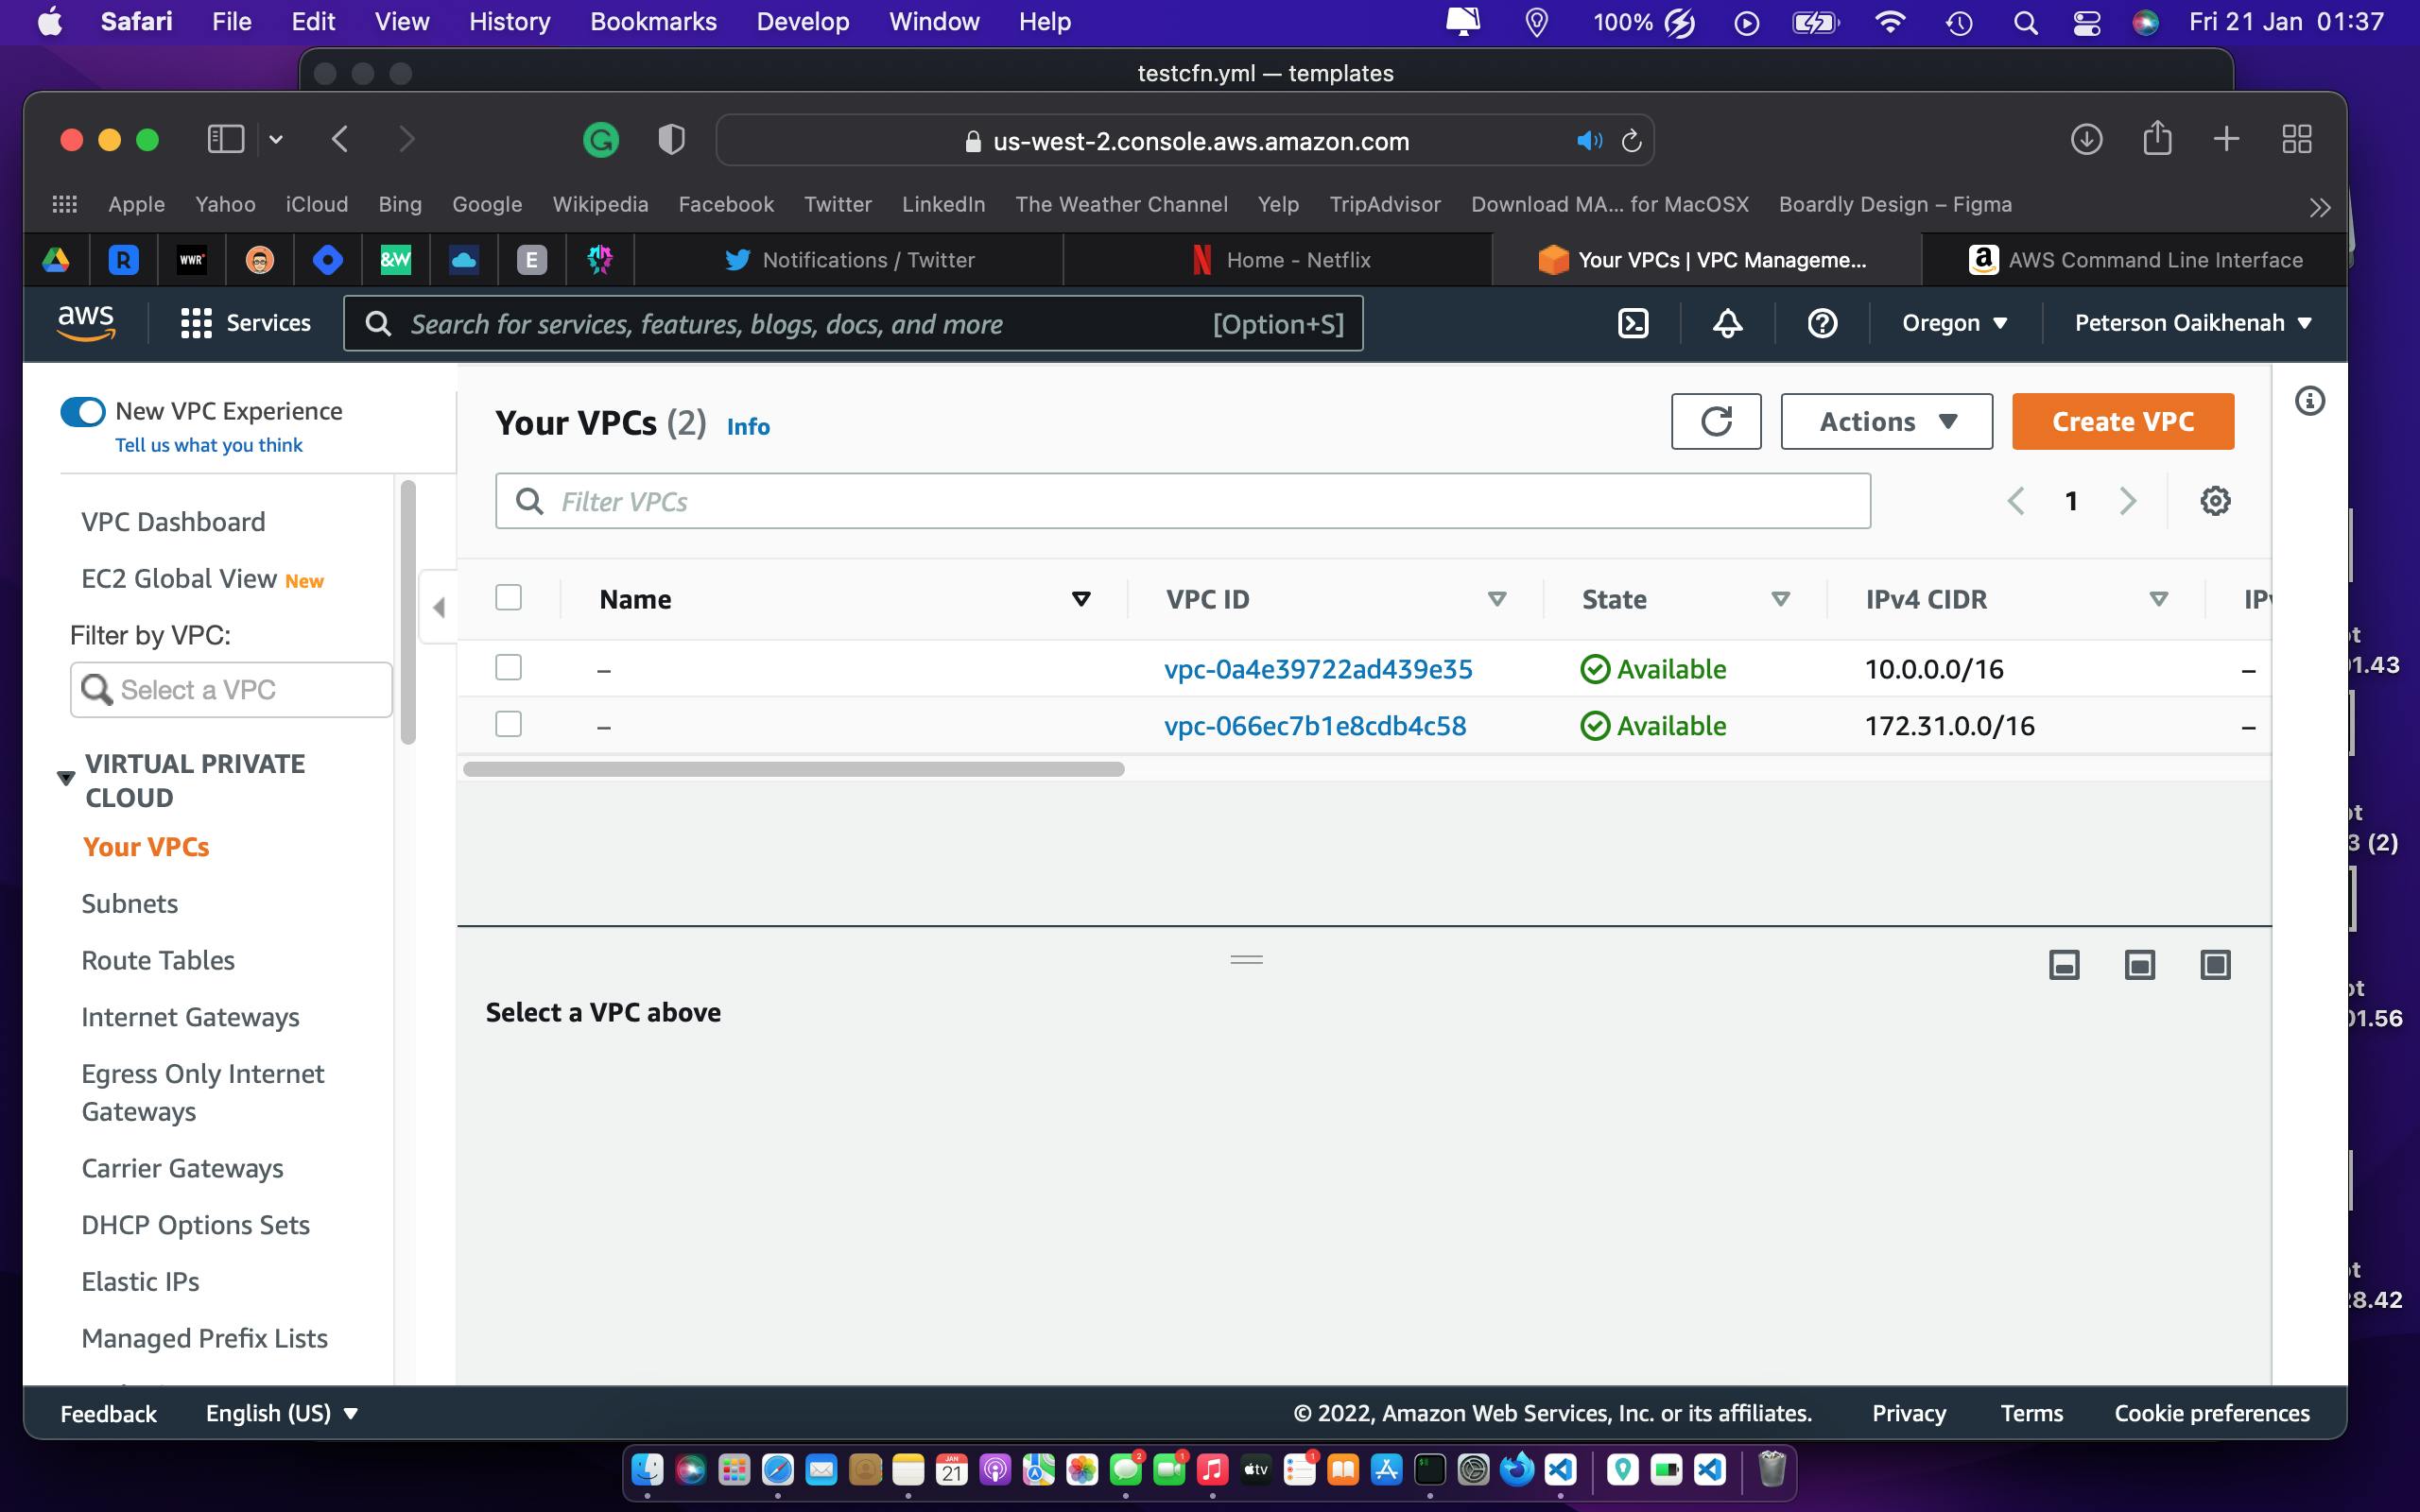
Yey! everything looks good. We successfully provisioned a VPC with cloudformation. 🚀😇
In this tutorial, you walked through setting up your AWS API user and used a cloud formation script to write a simple infrastructure. The VPC is a fundamental layer of your infrastructure. It isolates your network environment on a public cloud and other AWS resources and services operate inside of the VPC networks to provide cloud services.
You don't need to memorize the code that you need for each resource. You can find sample code in the documentation for CloudFormation for examples of how to write your CloudFormation scripts.
Thank you for the audience and I hope you found this article helpful 🤗. Feel free to reach out to me on Github, Twitter, and LinkedIn. Do drop a like, comment, and share 😌.
#Cloudcaptain 👨✈️